Your Ultimate Office Ergonomics Checklist: 8 Steps for 2025
In our modern work environment, where hours are spent at a desk, seemingly minor discomforts like back pain, neck strain, and persistent headaches have become alarmingly common. The root cause often isn't just the long hours themselves, but the physical setup of our workspace. A poorly configured desk can actively work against your body, silently undermining both your physical well-being and your professional productivity. This is where ergonomics, the science of fitting the workspace to the worker, becomes an essential tool for success and health.
This guide moves beyond generic advice to provide a detailed, step-by-step roadmap to audit and optimize every component of your workstation. Think of it as your definitive office ergonomics checklist, designed to help you systematically identify and fix issues that cause strain. By following these actionable checks for your chair, monitor, peripherals, and more, you can eliminate discomfort, reduce the risk of long-term injury, and create an environment that fosters focus and efficiency. For a more in-depth exploration and additional insights, you can also refer to a comprehensive office ergonomics checklist for further guidance. Let's transform your desk into a hub of comfort and peak performance.
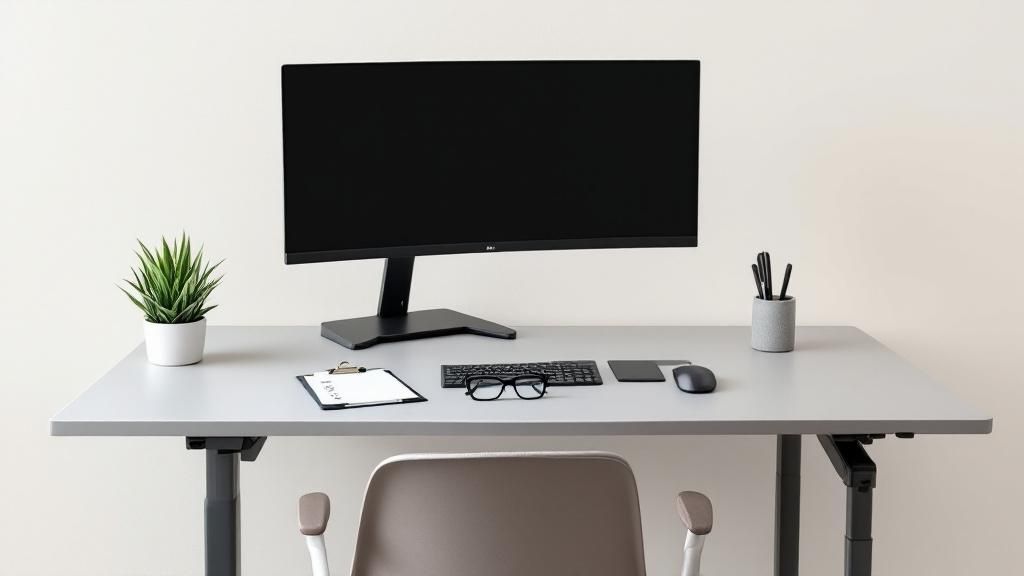
1. Monitor Height and Distance Adjustment
The first checkpoint on any comprehensive office ergonomics checklist is your monitor's position. Incorrect monitor placement forces your neck into unnatural angles and strains your eyes, leading to chronic pain, headaches, and computer vision syndrome. Proper adjustment ensures you maintain a neutral, comfortable posture throughout the workday, directly impacting your well-being and productivity.
This principle is so fundamental that leading organizations like the Occupational Safety and Health Administration (OSHA) and the American Optometric Association have established clear guidelines for it. Tech giants like Google and Microsoft also mandate specific ergonomic standards, often providing adjustable monitor arms to facilitate precise positioning for every employee.
How to Achieve Optimal Monitor Placement
Properly setting your monitor's height and distance involves two key actions:
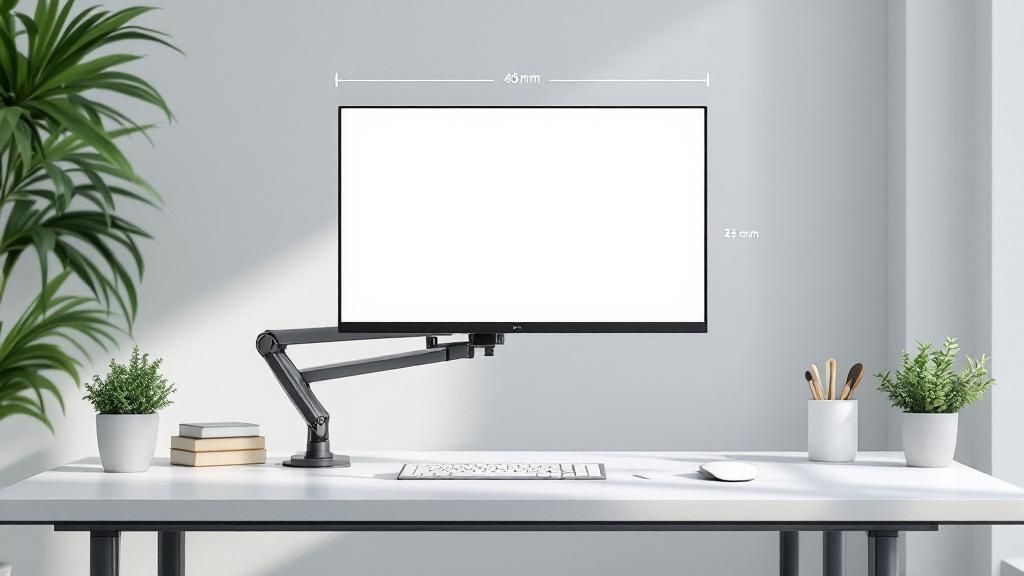
- Height Adjustment: The top edge of your screen should be at or just slightly below your natural eye level. This prevents you from tilting your head up or down, which places significant strain on your neck and upper back muscles over time.
- Distance Adjustment: Your monitor should be positioned approximately an arm's length away, typically between 20 to 26 inches from your eyes. This distance allows you to view the entire screen without excessive eye or head movement.
Key Insight: A common mistake is leaning forward to read small text. Instead of moving your body, increase the font size on your display. This maintains your posture while improving readability.
Actionable Tips for Implementation
Here are some practical tips to fine-tune your monitor setup:
- The Arm's Length Test: Sit back comfortably in your chair and extend your arm straight out. Your fingertips should just about touch the surface of your monitor. This is a quick and effective way to gauge the correct distance.
- For Bifocal Wearers: If you wear bifocal or progressive lenses, you may need to lower your monitor an additional 1 to 2 inches. This allows you to view the screen through the correct portion of your glasses without tilting your head back.
- Screen Maintenance: A clean screen is crucial. Regularly wipe away dust and smudges to reduce glare and prevent the eye strain that comes from trying to focus through a dirty display.
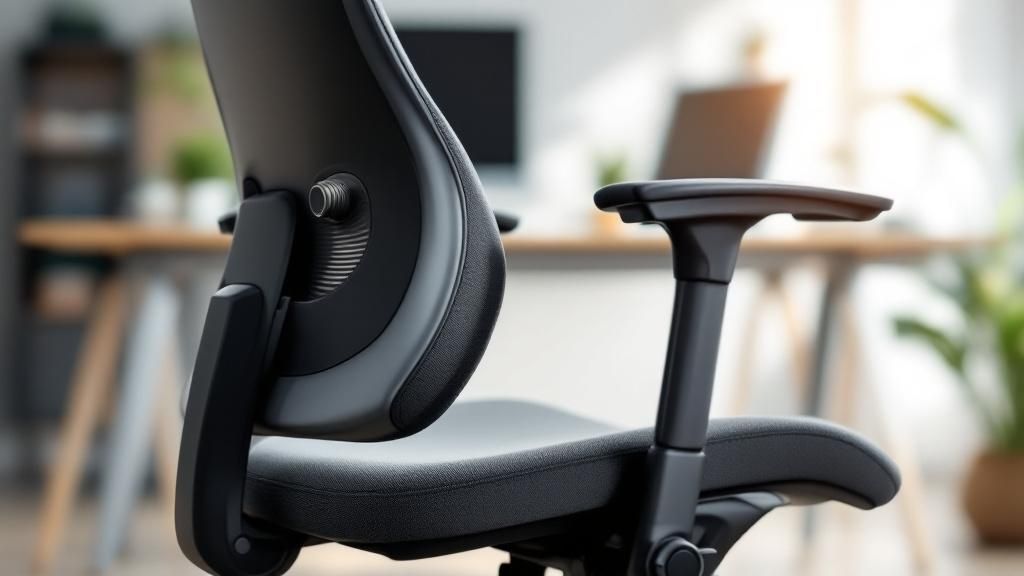
2. Chair Height and Lumbar Support Optimization
After positioning your monitor, the next critical item on your office ergonomics checklist is your chair. An improperly adjusted chair can negate all other ergonomic efforts, forcing your spine into a C-shape and leading to significant lower back pain, sciatica, and poor circulation. Optimizing your chair’s height and lumbar support is fundamental to maintaining the natural S-curve of your spine and achieving a healthy, sustainable sitting posture.
This principle is championed by pioneers in ergonomic design like Herman Miller and Steelcase, whose Aeron and Leap chairs are standard in forward-thinking companies like Apple and Google. These seating solutions are based on extensive biomechanical research from experts like Dr. Stuart McGill, who emphasizes that active spinal support is key to preventing long-term back injury.
How to Achieve Optimal Chair Adjustment
Properly setting your chair involves two primary adjustments to support your body's foundation:
- Height Adjustment: Your chair's height should allow your feet to rest flat on the floor or a footrest, with your thighs roughly parallel to the ground. This creates a stable base, preventing pressure on the backs of your thighs and promoting healthy blood flow.
- Lumbar Support: The backrest should be positioned to fit snugly into the natural curve of your lower back. This support prevents you from slouching and maintains spinal alignment, significantly reducing strain on your lumbar discs.
Key Insight: Many people sit on the edge of their seat, which completely disengages the chair's back support. To get the full ergonomic benefit, make a conscious effort to sit all the way back, allowing your lower back to make full contact with the lumbar support.
Actionable Tips for Implementation
Use these practical tips to dial in your seating position:
- The 90-Degree Elbow Test: Adjust your chair height so that when your arms are resting comfortably at your sides, your elbows form a 90 to 100-degree angle when you place your hands on your keyboard.
- Improvise Your Support: If your chair lacks built-in adjustable lumbar support, roll up a small towel or use a dedicated lumbar pillow. Place it in the small of your back to provide the necessary support.
- Ensure Foot Stability: If your feet dangle after adjusting the height for your desk, use a footrest. Your feet should never be left unsupported, as this puts strain on your lower back and legs. You can learn more about maintaining good posture in the office on spektrumglasses.com for additional guidance.
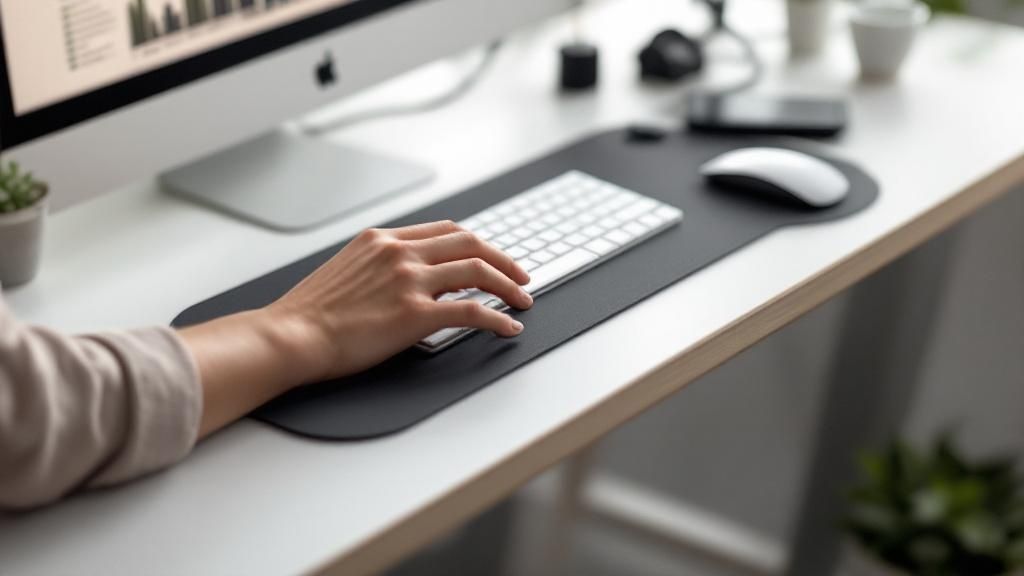
3. Keyboard and Mouse Positioning
The third critical point in any office ergonomics checklist is the positioning of your keyboard and mouse. Incorrect placement forces your wrists into awkward angles, leading to repetitive strain injuries (RSI) like carpal tunnel syndrome and tendonitis. Aligning these tools correctly keeps your wrists straight and your shoulders relaxed, preventing chronic pain and improving your long-term comfort and efficiency at the desk.
The importance of this principle is widely recognized, with pioneers like Dr. Alan Hedge from Cornell University providing foundational research. This research influenced corporate standards and the designs of leading peripheral manufacturers like Microsoft and Logitech, whose ergonomic keyboards and mice are now common in health-conscious workplaces. Early adopters like IBM even began implementing keyboard trays in the 1980s to promote better wrist posture.
How to Achieve Optimal Peripheral Placement
Properly setting up your keyboard and mouse focuses on maintaining a neutral, straight line from your elbow to your fingertips:
- Keyboard Position: Place your keyboard directly in front of you, centered with your body. Your elbows should be bent at a roughly 90-degree angle, and your forearms should be parallel to the floor. The keyboard should be flat or have a negative tilt (angling away from you) to keep wrists straight.
- Mouse Position: The mouse should be right beside the keyboard at the same height. This allows you to reach it easily without extending your arm or shoulder, minimizing strain on your upper body.
Key Insight: Avoid resting your wrists on the desk or a hard-edged wrist rest while typing. Instead, aim to keep your wrists "floating" in a neutral position. Use a soft gel rest for brief pauses, not for constant support during active typing.
Actionable Tips for Implementation
Here are some practical tips to refine your keyboard and mouse setup:
- Learn Keyboard Shortcuts: Reduce your reliance on the mouse by learning common keyboard shortcuts for your most-used applications. This significantly cuts down on repetitive arm and wrist movements.
- The Elbow Check: Your elbows should remain close to your body, not flared out. If you have to reach for your mouse, it's too far away.
- Consider Ergonomic Models: If you experience persistent wrist pain, a split or curved ergonomic keyboard can provide a more natural hand position. Similarly, a vertical mouse can alleviate pressure on the carpal tunnel.
- Switch It Up: Try switching your mouse to your non-dominant hand for a few hours a day. This gives your primary hand a break and helps balance the workload between your arms.
4. Lighting and Glare Reduction
A crucial yet often overlooked part of any office ergonomics checklist is your workspace lighting. Poor lighting and screen glare are major culprits behind digital eye strain, fatigue, and persistent headaches. Optimizing your lighting environment not only enhances visual comfort but also boosts focus and mood, creating a more pleasant and productive workspace.
This principle is championed by organizations like the Illuminating Engineering Society (IES) and demonstrated in the design of innovative workplaces. For instance, Pixar's animation studios use specialized task lighting to ensure artists can work for long hours without visual discomfort, while Apple’s corporate campuses are renowned for their emphasis on maximizing natural light.
How to Achieve Optimal Lighting and Reduce Glare
Effective lighting involves a balanced combination of ambient, task, and natural light while actively minimizing sources of glare on your screen.
- Ambient and Task Lighting: Your general room lighting (ambient) should provide comfortable visibility without being overly harsh. Supplement this with a dedicated task lamp to illuminate specific documents or your desk area, reducing the need for a bright, straining screen.
- Glare Control: Glare is the distracting reflection of light off your monitor. It forces your eyes to work harder to distinguish on-screen content, leading directly to strain and fatigue.
Key Insight: Your screen should not be the primary source of light in your room. Aim to match your monitor's brightness to the ambient light level around you. If the screen looks like a light source, it's too bright; if it appears dull and gray, it's too dark.
Actionable Tips for Implementation
Here are some practical tips to create a visually comfortable workspace:
- Position Your Monitor Correctly: Place your monitor perpendicular to windows, not directly in front of or behind them. This simple change dramatically reduces direct glare from sunlight.
- Control Natural Light: Use blinds, curtains, or shades to manage the intensity of incoming daylight throughout the day. For a more permanent solution, incorporating proper natural lighting products can diffuse sunlight effectively to reduce harsh shadows and improve focus.
- The 20-20-20 Rule: To combat eye strain, take a 20-second break every 20 minutes to look at something 20 feet away. This exercise helps relax your eye muscles.
5. Desk Height and Work Surface Setup
Beyond your chair and monitor, the desk itself is a cornerstone of your ergonomic setup. An improperly positioned work surface forces your arms, wrists, and shoulders into awkward, strained postures. A desk at the correct height ensures your body aligns naturally, preventing the repetitive stress injuries and discomfort that plague many office workers, making it an essential part of any office ergonomics checklist.
This concept has been championed by pioneers like Dr. James Levine, a Mayo Clinic researcher who highlighted the dangers of a sedentary lifestyle, popularizing the idea of "sitting disease." In response, companies like Vari (formerly Varidesk) and UPLIFT Desk have led a movement toward dynamic workspaces, with major corporations like Salesforce implementing robust standing desk programs to improve employee health and engagement.
How to Achieve Optimal Desk Placement
Properly setting your desk height is about creating a 90-degree angle at your elbows and ensuring ample clearance for your legs.
- Sitting Height: When seated, adjust your desk so that your forearms are parallel to the floor and your elbows form a relaxed 90-degree angle. Your wrists should remain straight, not bent up or down, when typing.
- Standing Height: When standing, the desk should be at the same elbow height, allowing for that same 90-degree angle and straight wrist posture. This prevents you from hunching over or reaching up to your keyboard.
- Sufficient Legroom: Ensure there is enough vertical and horizontal space under the desk to move your legs freely. Obstructions can force you into cramped, unnatural positions.
Key Insight: The goal isn't to stand all day. The real benefit comes from regularly changing your position. Alternating between sitting and standing is far more effective for preventing fatigue and strain than committing to one posture for hours.
Actionable Tips for Implementation
Here are some practical tips to optimize your desk and work surface:
- Alternate Regularly: Switch between sitting and standing every 30 to 60 minutes. Set a timer on your phone or computer as a reminder to change your position.
- Use an Anti-Fatigue Mat: When standing, use a cushioned anti-fatigue mat. This small addition significantly reduces pressure on your feet, legs, and back, making standing for longer periods much more comfortable.
- Start Gradually: If you are new to a standing desk, begin with short standing intervals of 15-20 minutes and gradually increase the duration as your body adapts.
- Readjust Your Monitor: Remember to raise your monitor to the correct eye level every time you switch from sitting to standing to maintain a neutral neck posture.
6. Document Holder and Reference Material Positioning
The sixth item on a complete office ergonomics checklist addresses the placement of physical documents and reference materials. Constantly looking down at papers on your desk and then back up at your screen creates repetitive neck twisting and bending. This repetitive motion, known as "Repetitive Strain Injury" (RSI), can lead to significant discomfort, muscle fatigue, and long-term spinal issues.
This ergonomic principle is heavily promoted by occupational health specialists and implemented by organizations like 3M and Fellowes, who design office solutions to combat such strains. Professions that rely on cross-referencing information, such as data entry clerks in insurance companies, legal professionals reviewing case files, and medical transcriptionists, consider proper document placement essential for daily comfort and efficiency.
How to Achieve Optimal Document Placement
Positioning your reference materials correctly involves placing them in-line with your monitor and keyboard. The goal is to minimize head and eye movement between the document and the screen.
- Height and Angle: The document holder should position your papers at the same height and viewing angle as your monitor. This creates a consistent visual plane, preventing you from needing to look down or to the side.
- Distance: Place the holder either next to your monitor or, for optimal ergonomics, directly between your keyboard and monitor. This "in-line" position eliminates neck twisting entirely.
Key Insight: The goal is to treat your physical document as a second screen. You wouldn't place a secondary monitor flat on your desk, and the same logic applies to your papers to prevent neck strain.
Actionable Tips for Implementation
Here are some practical tips for integrating a document holder into your setup:
- Choose the Right Holder: Select an in-line document holder that sits between your keyboard and monitor if you frequently reference papers. If reference is occasional, a freestanding holder placed next to your screen will suffice.
- Ensure Proper Lighting: Use a task light to illuminate the document directly. This prevents you from leaning in to read, which would defeat the purpose of the holder and cause eye strain.
- Maintain a Tidy Workspace: A document holder is a great tool for organization. Keeping your primary reference material on the holder reduces surface clutter. Learn more about how to keep your desk clutter-free on spektrumglasses.com for enhanced focus.
7. Footrest and Leg Support
An often-overlooked but critical component of an ergonomic workstation is what’s happening below your desk. A footrest provides essential support when your feet cannot rest flat on the floor after adjusting your chair to the correct height relative to your desk. This simple accessory prevents dangling feet, which can cause poor circulation, numbness, and undue pressure on the lower back and the backs of your thighs.
The importance of proper leg and foot support is championed by occupational therapists and leading ergonomic solution providers like Humanscale and Kensington. It’s a standard accommodation for shorter-stature employees in corporate settings and is even mandated in specialized environments like airline cockpits, where long periods of sitting demand optimal posture and circulation.
How to Achieve Optimal Leg Support
Properly using a footrest is about creating a stable foundation for your entire posture. The goal is to ensure your thighs are roughly parallel to the floor and your feet are firmly supported.
- When to Use It: A footrest is necessary only if, after setting your chair to the correct height for your desk (elbows at a 90-degree angle), your feet don't comfortably rest flat on the floor.
- Correct Positioning: Your feet should be able to sit flat on the footrest surface, maintaining a natural angle at your ankles. This stable base helps support the natural curve of your lower back and reduces pressure points.
Key Insight: A footrest isn't just a static block. The best ergonomic practice encourages slight, periodic changes in your foot position throughout the day to promote blood flow and prevent stiffness.
Actionable Tips for Implementation
Here are some practical tips to effectively incorporate a footrest into your office ergonomics checklist:
- Check for Clearance: Ensure the footrest you choose doesn't obstruct the movement of your chair's casters or get in the way as you move around your primary workspace.
- Consider Dynamic Features: Look for footrests with features like a rocking motion or a textured massage surface. These dynamic options encourage micro-movements in your feet and ankles, actively boosting circulation during long periods of sitting.
- Angle and Height Adjustability: Choose an adjustable footrest. This allows you to fine-tune the angle and height to perfectly match your body's unique requirements, ensuring your knees remain at a comfortable, neutral angle.
8. Regular Movement and Micro-Break Scheduling
An often-overlooked yet critical item on any office ergonomics checklist is the practice of integrating regular movement into your day. A static posture, even a perfect one, places continuous stress on the same muscle groups, restricts blood flow, and can lead to stiffness and repetitive strain injuries. Scheduling frequent, short breaks to move and stretch is essential for preventing physical fatigue and maintaining mental focus.
This concept is heavily promoted by workplace wellness experts and even draws from research in extreme environments. Dr. Joan Vernikos, a former NASA life sciences director, established that frequent, simple movements like standing up are more effective at combating the negative effects of a sedentary lifestyle than a single, long exercise session. This principle is now echoed in corporate wellness programs at companies like Google, which use built-in reminders to encourage employee movement.
How to Achieve Optimal Movement and Breaks
Integrating movement isn't about lengthy workouts; it's about consistently breaking up periods of sitting. This approach involves two core strategies:
- Micro-Breaks: These are very short breaks of 20 to 60 seconds taken every 20 to 30 minutes. The goal is to simply stand up, stretch, or change your position to reactivate muscles and relieve pressure.
- The 20-20-20 Rule: Popularized by the American Optometric Association to combat digital eye strain, this rule is also excellent for physical posture. Every 20 minutes, look at something 20 feet away for at least 20 seconds. This simple action encourages you to lift your head, adjust your focus, and often prompts a brief stretch.
Key Insight: The most significant ergonomic risk is not necessarily a bad posture, but a static one. The human body is designed for movement, and even the most "perfect" ergonomic setup becomes detrimental if you remain frozen in it for hours.
Actionable Tips for Implementation
Here are some practical tips to make regular movement a habit:
- Set Digital Reminders: Use your computer's calendar, a dedicated app, or even Microsoft's built-in Focus Timer to schedule break reminders every 30 minutes. When the alarm goes off, stand up immediately.
- Walk During Calls: If you're on a phone call that doesn't require you to be at your screen, use it as an opportunity to walk around the office or your home.
- Perform Desk Stretches: Incorporate simple stretches you can do at your desk, such as neck rolls, shoulder shrugs, and wrist flexes. This helps alleviate tension in key areas. For more ideas on how to improve your well-being at work, learn more about staying healthy in the modern office on spektrumglasses.com.
- Use the Stairs: Whenever possible, choose the stairs over the elevator. It’s a simple way to get your heart rate up and activate different leg muscles.
8-Point Office Ergonomics Checklist Comparison
| Item | Implementation Complexity 🔄 | Resource Requirements ⚡ | Expected Outcomes 📊 | Ideal Use Cases 💡 | Key Advantages ⭐ |
|---|---|---|---|---|---|
| Monitor Height and Distance Adjustment | Low to Moderate | Basic equipment (monitor arms/stands) | Reduced neck strain and eye fatigue | Workstations with single or dual monitors | Improves posture and reduces eye strain |
| Chair Height and Lumbar Support Optimization | Moderate | High-quality ergonomic chair | Prevents lower back pain, improves circulation | Office workers needing spinal support | Supports spinal alignment and reduces muscle fatigue |
| Keyboard and Mouse Positioning | Moderate | May need keyboard tray or ergonomic peripherals | Prevents repetitive strain injuries | Typists and heavy computer users | Reduces wrist strain, improves typing efficiency |
| Lighting and Glare Reduction | Low to Moderate | Lighting fixtures, filters | Reduces eye strain and headaches | Workspaces with variable natural and artificial lighting | Enhances visual comfort and alertness |
| Desk Height and Work Surface Setup | Moderate to High | Adjustable-height desk | Encourages movement, reduces sitting-related risks | Users alternating between sitting and standing | Improves circulation and accommodates different users |
| Document Holder and Reference Material Positioning | Low | Document holder accessory | Reduces neck strain and improves accuracy | Data entry, transcription, legal, and research work | Maintains consistent viewing angles |
| Footrest and Leg Support | Low | Adjustable footrest | Improves leg circulation and reduces back pressure | Users with shorter legs or insufficient chair height | Supports proper thigh angle and prevents swelling |
| Regular Movement and Micro-Break Scheduling | Low | None (reminders or timers) | Prevents muscle fatigue and eye strain | All sedentary desk workers | Increases alertness and reduces stiffness |
Transform Your Workday, One Check at a Time
Completing an office ergonomics checklist is not a one-and-done task; it’s the beginning of a sustained, conscious relationship with your work environment. Think of it less like assembling furniture and more like tending a garden. It requires initial setup, consistent attention, and periodic adjustments to flourish. Each item we've explored, from aligning your monitor to the precise height of your gaze to ensuring your feet are properly supported, is a crucial piece of a larger puzzle. Individually, they offer relief. Collectively, they create a powerful system that safeguards your long-term health and amplifies your professional output.
The journey to an ergonomic workspace is a highly personal one. While the principles are universal, their application is unique to your body, your desk, and your daily tasks. What works perfectly for a colleague might need slight modification for you. This is why the most critical takeaway from this guide is to become an active participant in your own comfort.
Key Insight: True ergonomic mastery isn't about achieving a single "perfect" posture. It's about creating a dynamic, responsive setup that allows you to move freely and comfortably throughout your day, listening and responding to your body's feedback.
From Checklist to Daily Habit
So, where do you go from here? The transition from reading a checklist to living an ergonomic lifestyle is built on small, consistent actions. Here are your next steps:
- Conduct a Self-Audit: Print out this checklist or open it on a separate device. Go through each point one by one, right now, at your current desk. Make immediate, small adjustments. You might be surprised by how a two-inch change in your chair height or a slight tilt of your keyboard can make a difference.
- Schedule a Weekly Review: Set a recurring 10-minute appointment in your calendar for the next month. Use this time to reassess your setup. Did that new lumbar pillow position feel right all week? Is screen glare becoming an issue in the afternoon? This regular check-in helps you fine-tune your environment and prevents old, painful habits from creeping back in.
- Prioritize Movement: An ergonomic setup is only half the equation. The other half is movement. Use a timer or an app to remind yourself to take micro-breaks. Stand up, stretch, walk to get water, and look away from your screen every 20-30 minutes. This is non-negotiable for preventing the stiffness and strain that come from static postures.
By methodically applying the principles from this office ergonomics checklist, you are making a profound investment in your own well-being. You are actively dismantling the systems that lead to chronic pain, eye strain, and burnout. You are building a foundation for a career that is not only productive and efficient but also sustainable and healthy. Your body is your most valuable professional asset; treat it with the care and attention it deserves.
As you optimize your physical setup, don't forget the final piece of the comfort puzzle: protecting your eyes from digital strain. The constant blue light from your monitor can disrupt sleep and cause fatigue. Complete your ergonomic transformation with a pair of high-quality blue light blocking glasses from Spektrum Glasses. Discover how Spektrum Glasses can reduce eye strain and improve your focus, making your newly ergonomic workspace even more effective.